REVIEW · BUDAPEST
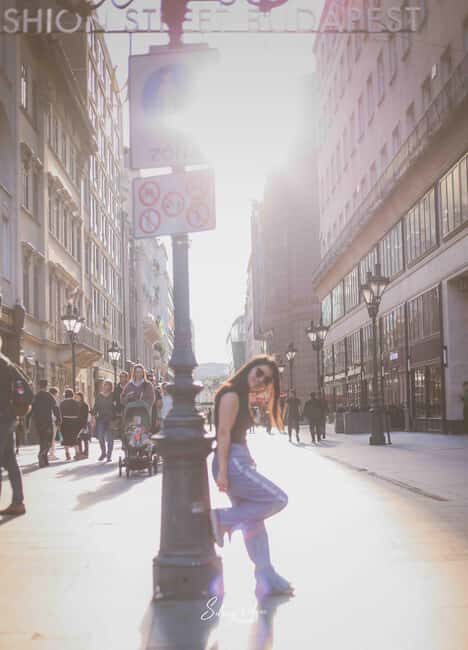
Explore Budapest in Pictures: Guided Tour Photo Tour
Book on GetYourGuide →Operated by Solange colque · Bookable on GetYourGuide
Budapest gets easier to shoot with a guide. This 3-hour photo tour is built for all levels, with personalized photographic advice as you move through Budapest’s most photographed corners. The vibe is friendly and practical, but one thing to think about is meeting-point reliability in bad weather, since there have been cases where the guide did not appear on time.
You’ll start at Chain Bridge, then work your way through Buda Castle, the Castle Quarter streets, Matthias Church, Budapest Parliament, and finish at Heroes’ Square. A small group keeps the pace calm, and you also get additional photos from the guide later, which is great if you want usable shots without fighting your camera every second.
In This Review
- Key things I’d focus on before you go
- What You’re Really Getting for $17 (and why the value can make sense)
- Chain Bridge: your first lesson in lines, symmetry, and Danube light
- Buda Castle and cobblestones: turning steep streets into confident shots
- Castle Quarter streets: small architectural details that make Budapest feel real
- Matthias Church: bright tiled color and how to shoot religious art without getting lost
- Parliament of Budapest: capturing an iconic building by day and (maybe) at dusk
- Heroes’ Square: ending with symmetry, statues, and a cleaner photo plan
- The photo coaching you can use right away (even if you only shoot with your phone)
- Meeting point and weather: the real-world risk you should plan for
- Who this tour fits best (and who should think twice)
- What to bring so the session feels smooth
- Should you book Explore Budapest in Pictures?
- FAQ
- How long is the Budapest photo tour?
- Where does the tour start?
- What language is the live guide?
- Is the tour wheelchair accessible?
- Are museum or monument entrance fees included?
- Do I get photos from the guide?
- Can I bring my phone or camera?
- Is there local transportation included?
Key things I’d focus on before you go

- Chain Bridge to Heroes’ Square: you’re covering the city’s big postcard set in just three hours, with photo coaching built in.
- Personalized tips: the guide adjusts advice to your level, not a one-size slideshow.
- Small group attention: fewer people means you can ask questions and actually test ideas on the spot.
- Photo help beyond shooting: you get composition, framing, and light-management guidance.
- Guide-taken photos later: added shots get mailed to you, useful for your best angles.
- Weather and timing matter: some bookings reported the guide not showing up, so arrive early and be ready to adapt.
What You’re Really Getting for $17 (and why the value can make sense)

At $17 per person for a 3-hour guided photo session, the math only works if the coaching is practical and the stops are efficient. This tour is aimed at exactly that: iconic locations plus hands-on guidance, in a small group.
Here’s what helps justify the price:
- A local photo tour guide with experience in showing people how to see.
- Photo tips tailored to your level, with an emphasis on composition, light, and framing.
- Access to unique angles and locations for better shots than you’d get wandering alone.
- Local transportation between some points if needed, so you don’t burn time on long transfers.
- Extra photos taken by the guide, mailed to you afterward—handy when your best images are the ones you didn’t manage to capture on your own.
The main thing to keep expectations grounded: entrance fees are not included. So if you want indoor views inside major sights, you’ll likely pay separately. The good news is that you still get plenty of strong exterior angles and city views along the way.
You can also read our reviews of more guided tours in Budapest


Chain Bridge: your first lesson in lines, symmetry, and Danube light

The tour starts at Chain Bridge, and that choice is smart. It’s a built-in training ground for two things photographers always struggle with: getting straight lines to behave and using the river light without washing out details.
From this start, you can practice:
- Shooting the bridge so the architecture leads your eye toward the city.
- Using the Danube River as a reflecting surface for a cleaner composition.
- Framing wide views that include the bridge, river, and skyline without turning everything into a blurry mess.
A practical tip for your first few minutes: set your phone or camera so you’re not constantly changing settings. When you’re learning, you want one change at a time. Then follow the guide’s suggestions about light and framing and test quickly.
One more reason this start works: Chain Bridge is visually busy, so the guide’s coaching helps you pick what matters. Not everything fits in one photo. That’s the whole lesson.
Buda Castle and cobblestones: turning steep streets into confident shots

Next comes Buda Castle, with cobblestone alleys and big city viewpoints. This is where many photo walks fall apart—crowds, uneven ground, and tricky lighting. The value here is that you’re not just sightseeing. You’re learning how to shoot this place like you know what you’re doing.
What you’ll likely enjoy most during this segment:
- Practicing framing when streets slope and buildings stack up.
- Learning to handle bright areas and darker corners in the same scene.
- Finding angles where you can include wide views without letting the image look flat or overly chaotic.
Cobblestones sound simple until you try walking while shooting. Your feet will be tired, and your camera hand will get shaky. Bring comfortable shoes and plan to shoot in short bursts. If you take one good photo every minute instead of 20 frantic attempts, you’ll come away happier.
Also, if you’re shooting with a phone, keep an eye on stabilization. Cobblestones can create micro-jitters, even when your stance feels steady.
Castle Quarter streets: small architectural details that make Budapest feel real
Then you move into the Castle Quarter streets, where the tour shifts from big monuments to human-scale textures—ancient gates, colorful facades, and everyday moments.
This part matters because Budapest isn’t just grand buildings. It’s also:
- Worn stone and doorways with character
- Color on plaster walls
- Corners that look like they belong in someone’s family album
The guide’s coaching helps you capture both “wow” and “everyday.” That’s the trick a lot of people miss. If you only shoot the big view from above, your set looks repetitive. If you balance it with details, your photos start to tell a story.
If you want photos that look more intentional, focus on one detail per shot:
- a window shape
- a gate line
- a painted wall section
- a texture near street level
Matthias Church: bright tiled color and how to shoot religious art without getting lost
Matthias Church is famous for its bright tiled ceiling and medieval character. It’s also one of those locations where it’s easy to rush—there’s so much to look at.
A key consideration: entrance fees are not included. So you may choose to stay on the outside for this part, depending on your priorities. Either way, this stop is valuable because you can still practice:
- Shooting vivid details without overexposing them
- Finding a composition that includes the church’s shape while keeping the ceiling tiles readable
- Balancing foreground elements with the main subject
If you do go for indoor views, be ready for extra time and a separate ticket decision. The tour is designed around photo stops, not paid-entry time.
You can also read our reviews of more photography tours in Budapest


Parliament of Budapest: capturing an iconic building by day and (maybe) at dusk
The tour heads to the Parliament of Budapest, one of Europe’s most recognizable buildings. This is where light timing becomes a real difference-maker.
The tour plan includes the opportunity to photograph it in daylight, and conditions permitting, at dusk. The “if conditions permit” part matters, because dusk timing depends on weather and the rest of the schedule that day. If you’re the type who hates missing the shot, plan to accept that sometimes you’ll get the best available version rather than the perfect one.
In practical terms, Parliament can be tough because:
- The building is huge and takes up most of your frame
- Daytime can make bright stone areas look flat
- Dusk can add mood but also increase shadow depth and contrast
The guide’s job here is to keep you from wasting time. Instead of aimless shooting, you’ll work on:
- framing so the building’s edges don’t warp
- managing contrast so details in ornate areas stay visible
- shooting angles that give the building presence without cutting off key features
Heroes’ Square: ending with symmetry, statues, and a cleaner photo plan
The final stop is Heroes’ Square, where you can perfect your technique with statuary and monuments. This is a strong ending point because it gives you a simple challenge: symmetry and “find the right balance.”
If you’ve been collecting shots all afternoon, your photos can drift into random variety. Heroes’ Square is a good reset. You can pick a clear composition and try a few variations:
- wide framing that shows the monuments’ full scale
- tighter crops of statues or decorative elements
- lower angles that make the monuments feel more imposing
This stop also tends to be calmer for review. You can look back at what you’ve been learning—light, framing, and subject choice—and make a few final images that actually match the style you’re trying to create.
The photo coaching you can use right away (even if you only shoot with your phone)
This tour promises more than a walk-and-point-it experience. The big value is that you receive practical advice on how to photograph Budapest’s atmosphere.
Based on what’s described, you’ll work on skills like:
- composition: deciding what belongs in the frame and what you cut
- light management: understanding when brightness helps and when it hides detail
- framing: using architecture, streets, and viewpoints to “organize” the scene
A smart way to get the most out of it: bring one goal, not ten. For example:
- I want my wide shots to include a clear foreground element.
- I want my close-ups to look crisp and not blown out.
- I want portraits of buildings that feel straight and not distorted.
The tour also allows you to bring cameras and cell phones. That’s important because it makes the advice more transferable. Even if you switch devices, composition and light still follow the same rules.
And don’t forget the tour provides additional photos by the guide. Even if you think your shots are great already, those photos can become your backup set or help you spot angles you missed.
Meeting point and weather: the real-world risk you should plan for

Here’s the honest part. Two low-score experiences reported that nobody showed up at the meeting point, including one instance where the person waited in extreme cold for a long time.
That doesn’t mean it will happen to you. It does mean you should treat this as a tour that can be affected by real-world timing and conditions. You should:
- Arrive a bit early and stay near the official meeting spot.
- Watch for the guide recognized because they’re wearing an umbrella.
- Bring warm layers if temperatures are low, because waiting in cold can turn unpleasant fast.
Also note a safety-fit warning: the experience is listed as not suitable for people with a cold. It also lists people with certain impairments as not suitable, even though it’s labeled wheelchair accessible in one place. If you need mobility support, don’t guess—confirm directly with the provider before you go.
Who this tour fits best (and who should think twice)
This is a good match if you:
- Want a short, focused photo plan across major Budapest sights
- Appreciate practical coaching rather than just sightseeing narration
- Like learning how to shoot monuments and small details, not only one category
- Are okay with moving on foot and doing multiple photo stops over three hours
It may be a poor match if you:
- Have a cold, since it’s listed as not suitable
- Rely on hearing or vision support, since it’s listed as not suitable for hearing- and visually-impaired people
- Have mobility concerns, because the listing contains conflicting notes (wheelchair accessible vs not suitable for mobility impairments)
- Prefer a silent, independent photo walk, because this is a Spanish-led guided experience
Language matters here. The live guide is Spanish, and some content may be shown in its original language. If you don’t speak Spanish, you might still get value from visual cues and shared photo guidance, but don’t expect full verbal explanations in your language.
What to bring so the session feels smooth
You’ll have a better time with:
- Comfortable shoes
- Your camera (or phone) and a charged smartphone
- Comfortable clothes and a daypack
- Cash (if you decide to pay for any entrances or extras)
- Food and drinks (especially if you’re walking between stops)
- A garbage bag (small but practical)
- If it’s chilly: extra layers, since Budapest weather can bite during photo pauses
The lesson here: you’re stopping often to shoot. Comfort matters more than you think.
Should you book Explore Budapest in Pictures?
I’d book it if you want a compact, coach-led way to photograph Budapest’s big sights and also learn how to shoot the smaller details that make a photo set feel real. The best reason to choose it is the combination of small-group attention plus photo instruction plus additional mailed photos.
I’d be cautious if you rely on punctual guide arrival or you’ll be traveling in extreme cold. The “wear an umbrella at the meeting point” detail is helpful, but the downside is that some people reported a total no-show. If you book, give yourself buffer time and be ready to manage the wait.
If you want a three-hour plan that teaches you how to see, not just where to stand, this is a solid bet.
FAQ
How long is the Budapest photo tour?
It lasts 3 hours.
Where does the tour start?
You’ll meet at the Chain Bridge area, and the guide is recognized by wearing an umbrella.
What language is the live guide?
The live tour guide speaks Spanish.
Is the tour wheelchair accessible?
The activity is listed as wheelchair accessible, but it also says it is not suitable for people with mobility impairments. If you have mobility needs, check with the provider first.
Are museum or monument entrance fees included?
No. Entrance fees for places that require them are not included.
Do I get photos from the guide?
Yes. The guide takes additional photos during the tour, and those photos will be mailed to you.
Can I bring my phone or camera?
Yes. You can bring cameras and cell phones.
Is there local transportation included?
Local transportation is included if necessary between some of the more remote points of the tour.