REVIEW · BUDAPEST
Budapest Photo Walks
Book on Viator →Operated by Budapest Photo Walks · Bookable on Viator
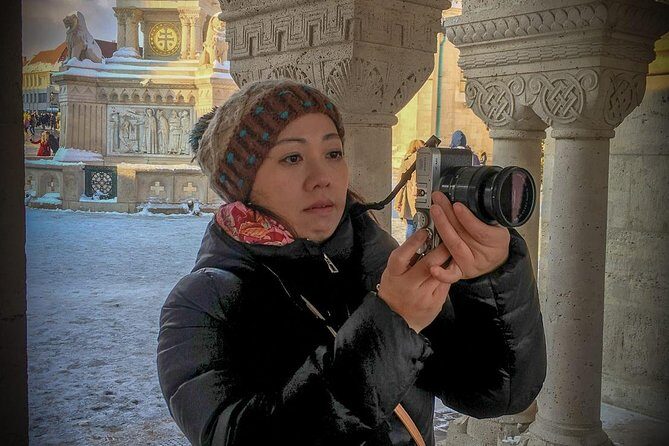
Budapest looks better through a lens. I love the customizable 2–3 hour route and the tripod support for steadier shots, especially after dark. You’ll get off-the-beaten-track viewpoints without the usual tourist shuffle, but note that weather and your comfort level help decide the final stop timing and how much ground you cover.
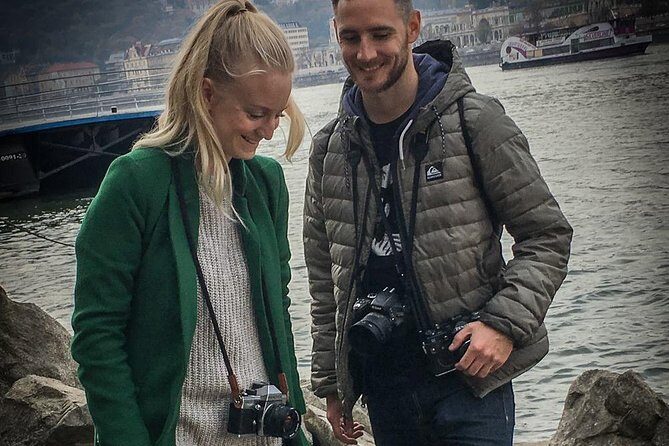
You can choose a day or nighttime itinerary, and I like that the guide can also teach composition and basic camera settings if you want a beginner-friendly primer. With a maximum of 2 people, you’re not lost in a crowd of camera bags and silent stares.
You start at Batthyány tér by the metro line M2, and the exact end point is agreed at the beginning of the tour. Expect around 4–5 main view points in the route, with extra time and places possible if conditions allow.
In This Review
- Key things that make this Budapest photo walk work
- Your pace, your photos: how the 2–3 hour format really feels
- Day vs night in Budapest: choosing the right mood for your photos
- Daylight route: clean lines and classic views
- Nighttime route: drama, silhouettes, and long-exposure potential
- Gellért Hill: the best high ground for both day and night
- Castell de Buda and the Chain Bridge view at night
- Liberty Bridge (Szabadság híd): framing Gellért Hill and the river lines
- Batthyány Square: the Parliament angle you’ll actually want to capture
- Tripod included: why that matters more on this route
- The guide factor: what Zoltán’s approach does for your photos
- Price and value: is $179.74 worth it?
- Practical details that affect your day (in a good way)
- Who this Budapest photo walk suits best
- Before you go: quick prep that makes the walk easier
- Should you book Budapest Photo Walks?
- FAQ
- How long is the Budapest Photo Walk?
- Is a tripod included?
- Can I choose a day or nighttime itinerary?
- Where do I meet for the tour?
- What is the maximum group size?
- What stops are included on the route?
- Is private transportation included?
- What if I need to cancel?
- Is the tour in English?
Key things that make this Budapest photo walk work
- Small group cap (2 people max) means more personal coaching and more time at each viewpoint
- Tripod included helps you plan for low-light and sharper results when light drops
- Day vs night choices let you match your photos to the mood you want
- Guided composition basics are available if you’re new to photography
- Flexible route: stops depend on weather and your fitness, not a rigid script
Your pace, your photos: how the 2–3 hour format really feels

This is built as a short, focused outing. You’re not trying to “see everything” across Budapest in a blur. Instead, you’re walking between major vantage points and using that time to practice how to frame a city scene.
The tour is typically 2 to 3 hours, and it’s designed around the reality that your pace matters. The guide can cover 4–5 main view points, depending on what you want and how you’re feeling. That flexibility is a big deal. If you’re comfortable walking and shooting, you can usually cover more. If you’d rather slow down and really work one spot, you’re not forced to rush.
One practical detail I appreciate: the itinerary can shift based on weather. That matters in Budapest because light and visibility can change quickly, and certain nighttime shots are more satisfying when the sky cooperates.
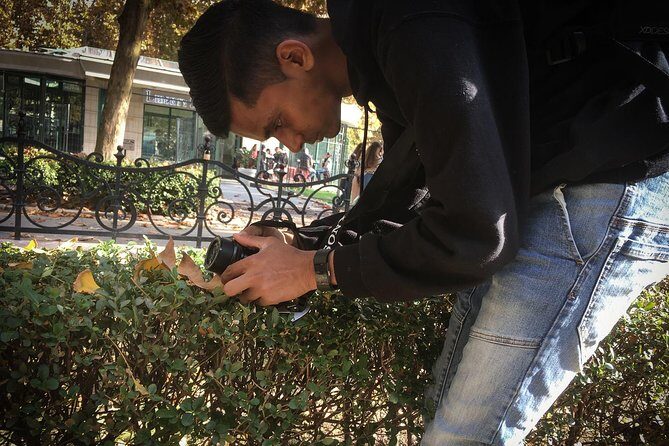
Also, this isn’t just a “stand here and take a picture” walk. It includes help with composition and camera settings when you need it. You can keep it simple—just follow along and learn by doing—or ask for more hands-on guidance if you’re trying to understand what your camera is doing.
You can also read our reviews of more tours and experiences in Budapest.


Day vs night in Budapest: choosing the right mood for your photos
Picking day or nighttime changes the kind of photos you’ll come home with.
Daylight route: clean lines and classic views
In the daytime, you’ll focus on bright, readable city scenes. The big advantage is clarity. Bridges, hills, and building edges tend to look crisp, and you can spend less time worrying about exposure and more time on framing.
The route includes Liberty Bridge (Szabadság híd) and the Batthyány Square area for a classic Parliament view. In daylight, those angles are easier to judge on the spot, so you can make quick composition decisions—especially if you’re still learning.
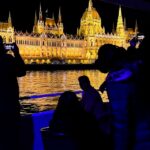
Nighttime route: drama, silhouettes, and long-exposure potential
Night is where Budapest starts looking cinematic. The route brings in extra viewpoint options and a more “lights-on” feel. You’ll spend time near Gellért Hill, head toward Castell de Buda, and see major bridge perspectives after dark.
Nighttime also pairs well with the fact that a tripod is included. Even if you don’t use it for every shot, having it available lets you slow down and try steadier results when the light gets dimmer.
If you’re the type who likes experimentation—blur for motion, sharper light points, experimenting with framing—night can be the better match.
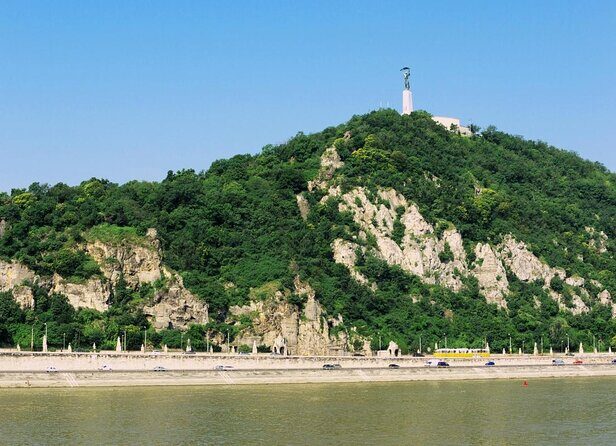
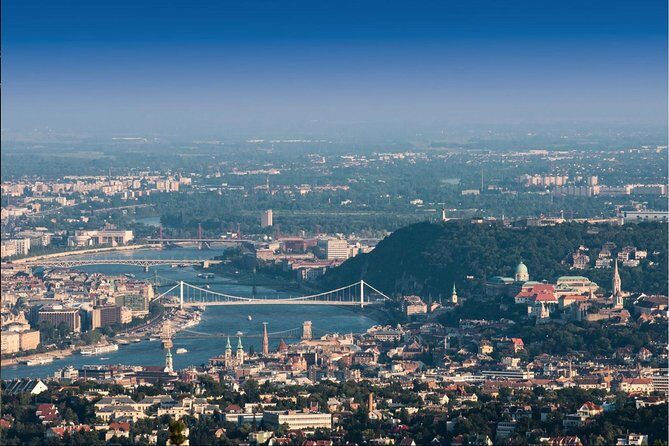
Gellért Hill: the best high ground for both day and night
Gellért Hill is the anchor stop. It’s on both the day and night route, and it’s the one location that tends to reward time spent getting angles right.
During the tour, you’ll cover multiple main view points linked to the hill area. Depending on your requests and fitness, you can hit about 4–5 main viewpoints total across the entire walk, and Gellért Hill is where a lot of that “wow” energy typically comes from.
What makes this stop valuable is the way it lets you photograph Budapest as layers:
- the river and bridges below
- the city spread across the bank
- the skyline shapes that change as you move a few steps
The tour timing here is flexible. The stop is set around 15 minutes at the hill, but the guide can often adjust based on conditions. In clear weather, you’ll likely want extra time to test different framing distances. If it’s windy or visibility is limited, focus on getting one strong composition and keep moving.
Tip for your shots: plan to shoot from a couple spots rather than one. Even a small shift can change how the river and bridge lines meet in your frame.


Castell de Buda and the Chain Bridge view at night
If you choose the nighttime itinerary, this is one of the standout additions: Castell de Buda, with a view that includes the Chain Bridge.
This is a stop that makes sense specifically after dark. The Chain Bridge and surrounding structures often look more graphic when you can separate lights and silhouettes. In daytime you can still photograph it, but at night it feels more “designed” for photos.
The timing is listed around 15 minutes. That’s enough to:
- find a comfortable stance
- set up framing
- try a couple variations (wider vs tighter composition)
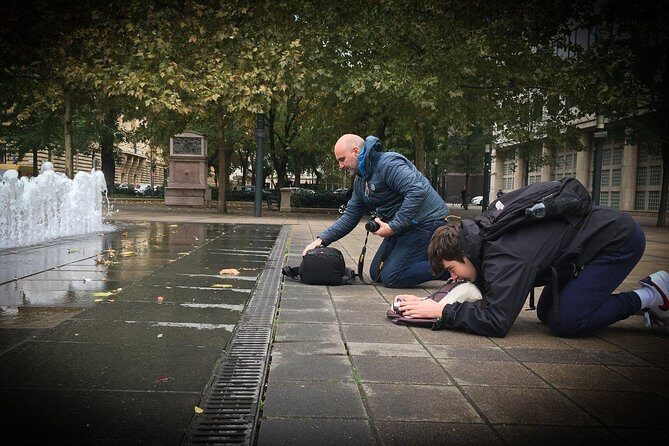
Because the tour is small, you’re more likely to get help fine-tuning where to stand and how to orient your camera. That’s especially useful if you’re working with a tripod and want a stable setup without blocking others for too long.
If it’s cold or windy (which can happen around river and hill viewpoints), bring layers and keep your hands warm. You’ll shoot better when you’re not rushing.
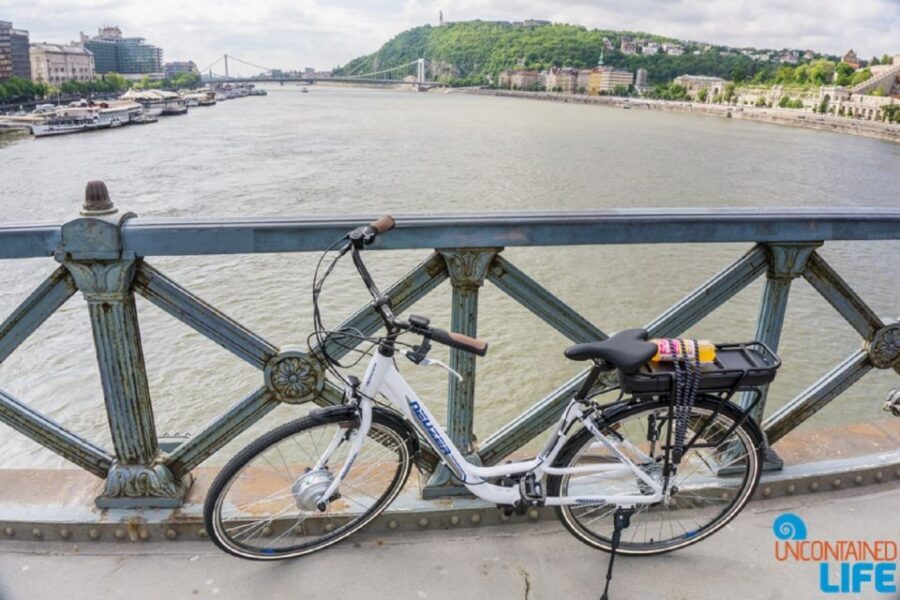
Liberty Bridge (Szabadság híd): framing Gellért Hill and the river lines
Liberty Bridge (Szabadság híd) is a key photo moment in both the day and night routing. The idea is simple: you get a bridge view that also includes Gellért Hill in the bigger scene.
The stop is about 20 minutes, and that extra minute or two can matter. With bridges, you’ll often want to try:
- a perspective where the bridge leads into the hill view
- a composition that emphasizes the curve of the river and the relationship between buildings
In practice, this stop is where I’d expect beginners to get the most immediate rewards from guidance on composition. If you’ve never thought about leading lines or how two landmarks “balance” in the same frame, this is an easy lesson because the architecture naturally forms shapes for you.
Tripod reality check: if you use the tripod at the bridge area at night, take a moment to make sure it’s level and stable. That sounds obvious, but it’s where a lot of night shots are won or lost.
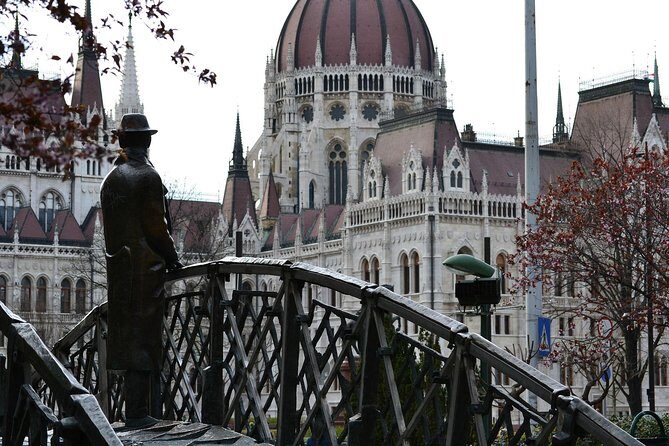
Batthyány Square: the Parliament angle you’ll actually want to capture
Batthyány Square is where the tour leans into the classic Budapest look. It’s about 15 minutes, and it’s geared around getting a classic Parliament view.
Daytime works because details are easier to read. Night works because the lights can make the scene feel more dramatic and structured. Either way, this stop is a strong target because it’s recognizable and composed for cameras.
The guide’s job here is more than pointing you in the right direction. Since the walk is customizable and depends on weather and fitness, they’ll likely help you choose:
- the angle that shows the right balance between Parliament and surrounding elements
- a stance that keeps your framing clean
If you’re new to photography, this is also a good place to learn what to do when a scene is too complex. Big monuments and bridges can overwhelm your viewfinder. You’ll get practical coaching on how to simplify the photo into something you can actually control.
Tripod included: why that matters more on this route
A lot of city photo walks leave you to figure out the “low light problem” on your own. This one includes a tripod, which changes what you can attempt—especially on the night route.
Here’s why it’s valuable:
- It encourages deliberate framing (you’ll pause more and shoot smarter)
- It supports steadier shots when light drops
- It makes it easier to experiment without constantly fighting blur
You don’t have to turn every shot into a long-exposure project. But having the tripod means you can try at least a few compositions where steadiness helps.
If you’re bringing your own camera gear, great—but you can also travel light. The included tripod means you don’t need to pack extra bulk just to try night photography.
The guide factor: what Zoltán’s approach does for your photos
One review I found especially useful mentioned Zoltán. The praise wasn’t vague. It was about how he explains things in a way that makes sense, plus his guidance on night spots for pictures. The same review also highlighted his city knowledge, including historical context.
That combination matters. A good photo walk guide does two jobs:
1) helps you take better photos
2) helps you understand what you’re seeing so your choices feel intentional
With Budapest’s views, it’s easy to just shoot the obvious postcard angle. The better results come when you learn how the city sits in space, how bridges connect zones, and how hill viewpoints change the story your photo tells.
In a small group, that kind of coaching lands faster because you can ask questions and get real adjustments rather than general tips meant for everyone.
Price and value: is $179.74 worth it?
At $179.74 per person, this isn’t the cheapest thing you can do in Budapest. But price isn’t the whole story here—value is about what’s included and how the experience is structured.
Here’s the value math that matters:
- The walk is 2–3 hours with guided viewpoint planning
- Tripod is included, which saves you the hassle and cost of renting/bringing one
- The group size is capped at 2 people max, which usually translates to more focused time
- You get support for composition and camera settings if you want it
- You can choose day or night, so you’re not locked into one photo mood
Also, this is often booked around 46 days in advance on average. That suggests people are picking specific days/times, likely because night sessions and limited group size make scheduling matter.
Is it worth it for everyone? Not automatically. If you only want casual sightseeing photos and you don’t care about learning, you could find free viewpoint time on your own. But if you want guidance that helps you actually improve your photos in a short window, this price can feel fair.
Practical details that affect your day (in a good way)
A few logistics points matter because they affect comfort and planning:
- Meeting point: Batthyány tér (Metro M2), in front of the M2 station
- Start and end: start is fixed; the end point is agreed with you at the beginning
- No private transportation is included, so plan to arrive by foot or public transit
- The tour runs Thursday to Sunday, roughly from 10:00 AM to 6:00 PM
- Duration and exact stops can vary with weather and fitness
Because the tour is near public transportation, it’s easy to pair with other activities. And since the walk is capped at two people, you’re not stuck in a slow-moving group that breaks your shooting rhythm.
If you’re planning around daylight: choose day for clearer details and faster results. Choose night if you want mood, silhouettes, and tripod-friendly experimentation.
Who this Budapest photo walk suits best
This experience fits best if you:
- Want better photos fast, without wandering aimlessly
- Are a beginner who wants a straightforward primer on composition and camera settings
- Prefer a small, question-friendly group (max 2 people)
- Like photographing landmarks like Gellért Hill, the bridges, and the Parliament area
It also works if you’re simply serious about getting the right shot rather than just collecting snaps. The guide’s flexibility means the route can shift based on your needs and how you’re doing.
If you’re traveling with a service animal, the tour allows service animals. And since most people can participate and the route can be adjusted to fitness, it’s generally approachable as an active walking experience.
Before you go: quick prep that makes the walk easier
You’ll get the best results if you show up ready to shoot and to pause.
Bring:
- A camera with enough battery (and memory space)
- Comfortable shoes for uneven viewpoints
- Layers if you’re doing night—river and hill air can feel colder than you expect
Also decide in advance what you want:
- Do you want classic postcard framing?
- Or do you want to practice compositions and learn camera basics?
If you’re open about your goals at the start, the route choices and coaching are more likely to match your style.
Should you book Budapest Photo Walks?
Book it if you want a tight, high-return photography outing in Budapest. The combination of small group size, tripod included, and the option for composition coaching makes this one of the more practical photo tours for improving your results in a couple hours.
Skip it (or adjust expectations) if you only want casual sightseeing and you don’t care about photography instruction. At $179.74 per person, this is best as a photo-focused experience, not a general history stroll.
If you’re aiming for a specific day or want the night route, book early. The average booking lead time is about 46 days, and small-group tours tend to fill when people lock in their plans.
FAQ
How long is the Budapest Photo Walk?
It’s typically 2 to 3 hours.
Is a tripod included?
Yes. A tripod is included with the tour.
Can I choose a day or nighttime itinerary?
Yes. You can choose between day and nighttime photo walks, with flexible dates and times.
Where do I meet for the tour?
Meet at Batthyány tér at the metro M2 station, in front of the M2 station.
What is the maximum group size?
The tour has a maximum of 2 travelers.
What stops are included on the route?
The walk can include viewpoints at Gellért Hill, Castell de Buda (night only), Liberty Bridge (Szabadság híd), and Batthyány Square with a classic Parliament view.
Is private transportation included?
No. Private transportation is not included.
What if I need to cancel?
You can cancel for a full refund up to 24 hours before the experience start time.
Is the tour in English?
Yes. It’s offered in English.